Mastering the Art of Tulip Planting: Seasonal Tips for Every Climate
Mastering the art of tulip planting can transform any garden into a vibrant display of color and beauty, but understanding the nuances of seasonal care is key to success. Tulips, with their rich history and diverse varieties, offer endless possibilities for gardeners in any climate. Whether you are a beginner looking to start your first tulip bed or an experienced horticulturist seeking to perfect your technique, this guide will provide you with essential tips for every season. From selecting the right species and understanding the tulip scientific name and family, to learning the best planting practices and year-round maintenance, you will discover everything you need to cultivate a stunning tulip garden. Let’s delve into the fascinating world of tulips and unlock the secrets to growing these beloved blooms.
How to Plant Tulips: Tips for Every Season
Preparing Your Soil
Getting your soil ready for tulip planting is crucial for healthy growth and vibrant blooms. Start by selecting a site with well-drained soil and plenty of sunlight, as tulips thrive in these conditions. Before planting, test the soil pH, aiming for a slightly acidic to neutral range between 6.0 and 7.0. Amend the soil with organic matter like compost or well-rotted manure to improve its fertility and drainage. This helps the tulip bulbs develop strong roots.
Work the amendments into the top 12 inches of soil using a garden fork or tiller. Break up any large clumps to ensure a smooth planting surface. If your soil is heavy clay, consider creating raised beds or adding sand to enhance drainage. By carefully preparing your soil, you create an ideal environment for tulips to flourish, setting the stage for a beautiful and successful garden display.
Planting Tulip Bulbs in Spring
Planting tulip bulbs in spring is less common, as they typically require a period of cold dormancy to bloom. However, if you’ve missed the fall planting window, there are still options. Start by purchasing pre-chilled tulip bulbs from a garden center, which have undergone the necessary cold treatment. Choose a sunny location with well-drained soil for planting.
Dig holes about 6 to 8 inches deep, and place the bulbs pointed end up. Space them approximately 4 to 6 inches apart to give each plant room to grow. Cover the bulbs with soil and water them thoroughly to settle the soil and remove air pockets. Adding a layer of mulch can help retain moisture and regulate soil temperature.
While spring-planted tulips may not bloom as reliably as fall-planted ones, they can still add beauty to your garden. With proper care, you can extend the flowering season and enjoy these stunning flowers.
Fall Planting Techniques
Fall is the ideal time for planting tulip bulbs, as it allows them to establish roots before winter. Start by selecting healthy, firm bulbs free from mold or damage. Choose a planting site with well-drained soil and full sun exposure.
Dig holes 6 to 8 inches deep, placing bulbs pointed end up. Space them 4 to 6 inches apart to ensure adequate room for growth. For a more natural look, plant tulip bulbs in clusters rather than straight rows. Cover the bulbs with soil, and water thoroughly to help settle the soil.
To protect the bulbs from frost, add a 2 to 3-inch layer of mulch on top. This also helps retain moisture and prevent weeds. Water the area periodically if fall rains are scarce but avoid overwatering, which can cause rot.
By following these fall planting techniques, you set the stage for a vibrant spring display of tulips, showcasing their full beauty.
Seasonal Care for Tulips: Year-Round Maintenance
Bulb Preparation and Storage
Proper bulb preparation and storage are essential for ensuring tulips return beautifully each year. After tulips have finished blooming, allow the foliage to die back naturally. This process lets the plant gather energy for the next growing season. Once the leaves have yellowed and dried, carefully dig up the bulbs using a garden fork to avoid damage.
Brush off excess soil, and inspect the bulbs for signs of disease or rot. Discard any damaged bulbs. Before storing, cure the bulbs in a dry, airy place for a week or two. This step helps to toughen their outer skin, which is crucial for prolonged storage.
Store the cured bulbs in a cool, dry location, ideally between 50-60°F. Use mesh bags or ventilated containers to prevent moisture buildup, which can lead to rot. Label the bulbs by variety and color for easy replanting in the fall. By taking these steps, you ensure your tulips remain healthy and vibrant year after year.
Watering and Fertilizing
Proper watering and fertilizing are key to maintaining healthy tulips throughout the year. After planting, water the bulbs thoroughly to help establish roots. During the growing season, keep the soil consistently moist but not waterlogged. Overwatering can cause bulb rot, while underwatering may stunt growth.
Tulips benefit from a balanced, slow-release fertilizer applied at planting time and again in early spring as shoots emerge. Use a fertilizer with an N-P-K ratio of 10-10-10 or similar. Follow the manufacturer’s instructions for application rates to avoid over-fertilizing, which can harm the plants.
Regularly monitor soil moisture levels, especially during dry periods. Water deeply but infrequently, ensuring the moisture reaches the root zone. Mulching around the plants can help retain soil moisture and reduce weeds.
By providing consistent watering and appropriate fertilization, you can support the growth and longevity of your tulips, resulting in vibrant and healthy blooms year after year.
Post-Bloom Care
Caring for tulips after they bloom is crucial for ensuring their return in subsequent years. Once the flowers have faded, remove spent blooms to prevent seed formation, which can divert energy away from bulb development. Use clean, sharp scissors or pruners to cut the flower stalks just above the leaves.
Allow the foliage to remain intact until it withers and turns yellow, as it plays a vital role in photosynthesis and nutrient storage in the bulb. This process can take several weeks but is essential for strong flowering next spring.
During this period, continue to water the tulips if rainfall is insufficient, but reduce the frequency as the foliage begins to die back. Avoid fertilizing, as the focus should be on natural nutrient absorption from the soil.
If you plan to lift and store the bulbs, wait until the foliage has completely died back before digging. Proper post-bloom care sets the foundation for thriving tulips in the next growing cycle.
Creative Landscaping with Tulips: Design Ideas for Stunning Displays
Combining Tulips with Other Plants
Integrating tulips with other plants can create stunning visual displays and add diversity to your garden. When choosing companion plants, consider those that complement the tulips’ bloom time and enhance their vibrant colors. Perennials like daffodils, hyacinths, and muscari are excellent choices, as they share similar growing conditions and bloom in spring.
For a more extended season of interest, pair tulips with early-blooming shrubs like forsythia or lilacs, which can provide a backdrop of greenery and additional flowers. Groundcovers such as creeping phlox or ajuga can fill in gaps and create a lush carpet beneath the towering tulips.
Consider foliage plants like hostas or ferns, which emerge later in the season, to fill in spaces and provide texture after the tulips fade. By thoughtfully combining tulips with other plants, you can achieve a dynamic and cohesive garden design that captivates throughout the growing season.
Designing Color Schemes
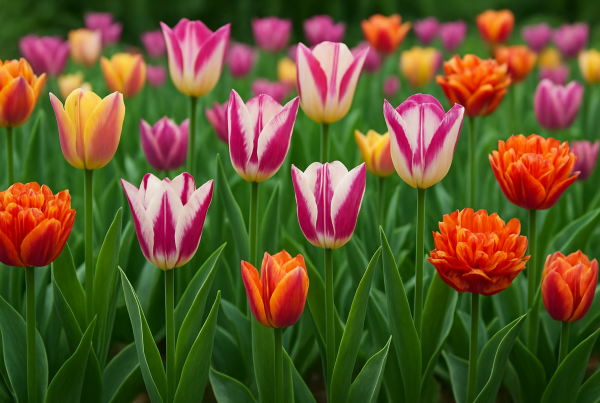
Creating a captivating color scheme with tulips can transform any garden into a visual masterpiece. Start by selecting a color palette that complements your garden’s existing features and personal aesthetics. Monochromatic schemes, using different shades of a single color, offer a sophisticated and harmonious look. For example, varying tones of pink can create a soft, romantic effect.
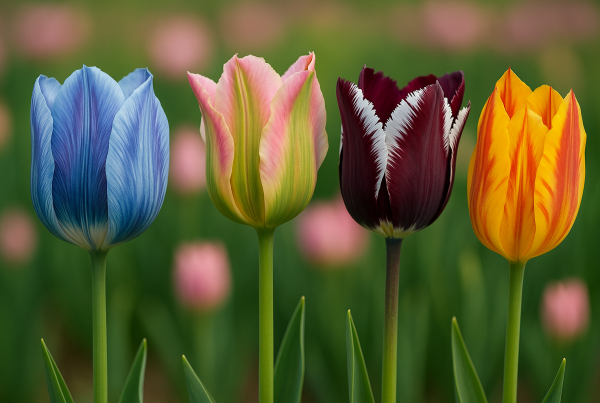
Alternatively, consider contrasting colors for a bold statement. Pairing complementary colors, such as purple and yellow or red and green, brings energy and vibrancy to your landscape. Triadic color schemes, using three colors evenly spaced on the color wheel, like red, blue, and yellow, offer balance and harmony.
When designing your color scheme, consider the bloom time of different tulip varieties to ensure a continuous display. Mix early, mid, and late-season bloomers to extend the flowering period. By carefully planning your color schemes, you can create a dynamic and visually appealing garden that delights through the seasons.
Creating Patterns and Shapes
Designing patterns and shapes with tulips can add a striking dimension to your garden. Start by planning your layout on paper, considering the overall shape and flow of your garden space. Geometric patterns, such as squares, circles, or triangles, can provide a formal and structured look. For example, planting tulips in concentric circles can create a focal point that draws the eye.
For a more naturalistic design, consider sweeping drifts or waves of color that mimic the organic flow of nature. Randomly scatter bulbs within defined areas for a meadow-like appearance, blending different varieties and colors for a more relaxed, informal feel.
Interplant tulips with other spring flowers to create intricate mosaics. Use contrasting foliage plants to define edges and accentuate the patterns. Pathways lined with tulips can guide visitors through the garden, highlighting different sections.
By experimenting with patterns and shapes, you can create a unique and visually compelling tulip display that enhances the overall beauty of your garden.


